Embarking on a bathroom remodel can be an exciting venture, but it’s crucial to start with a solid foundation. Before any new installations or aesthetic upgrades, the existing space must be properly prepared. This involves a strategic demolition process and thorough planning.
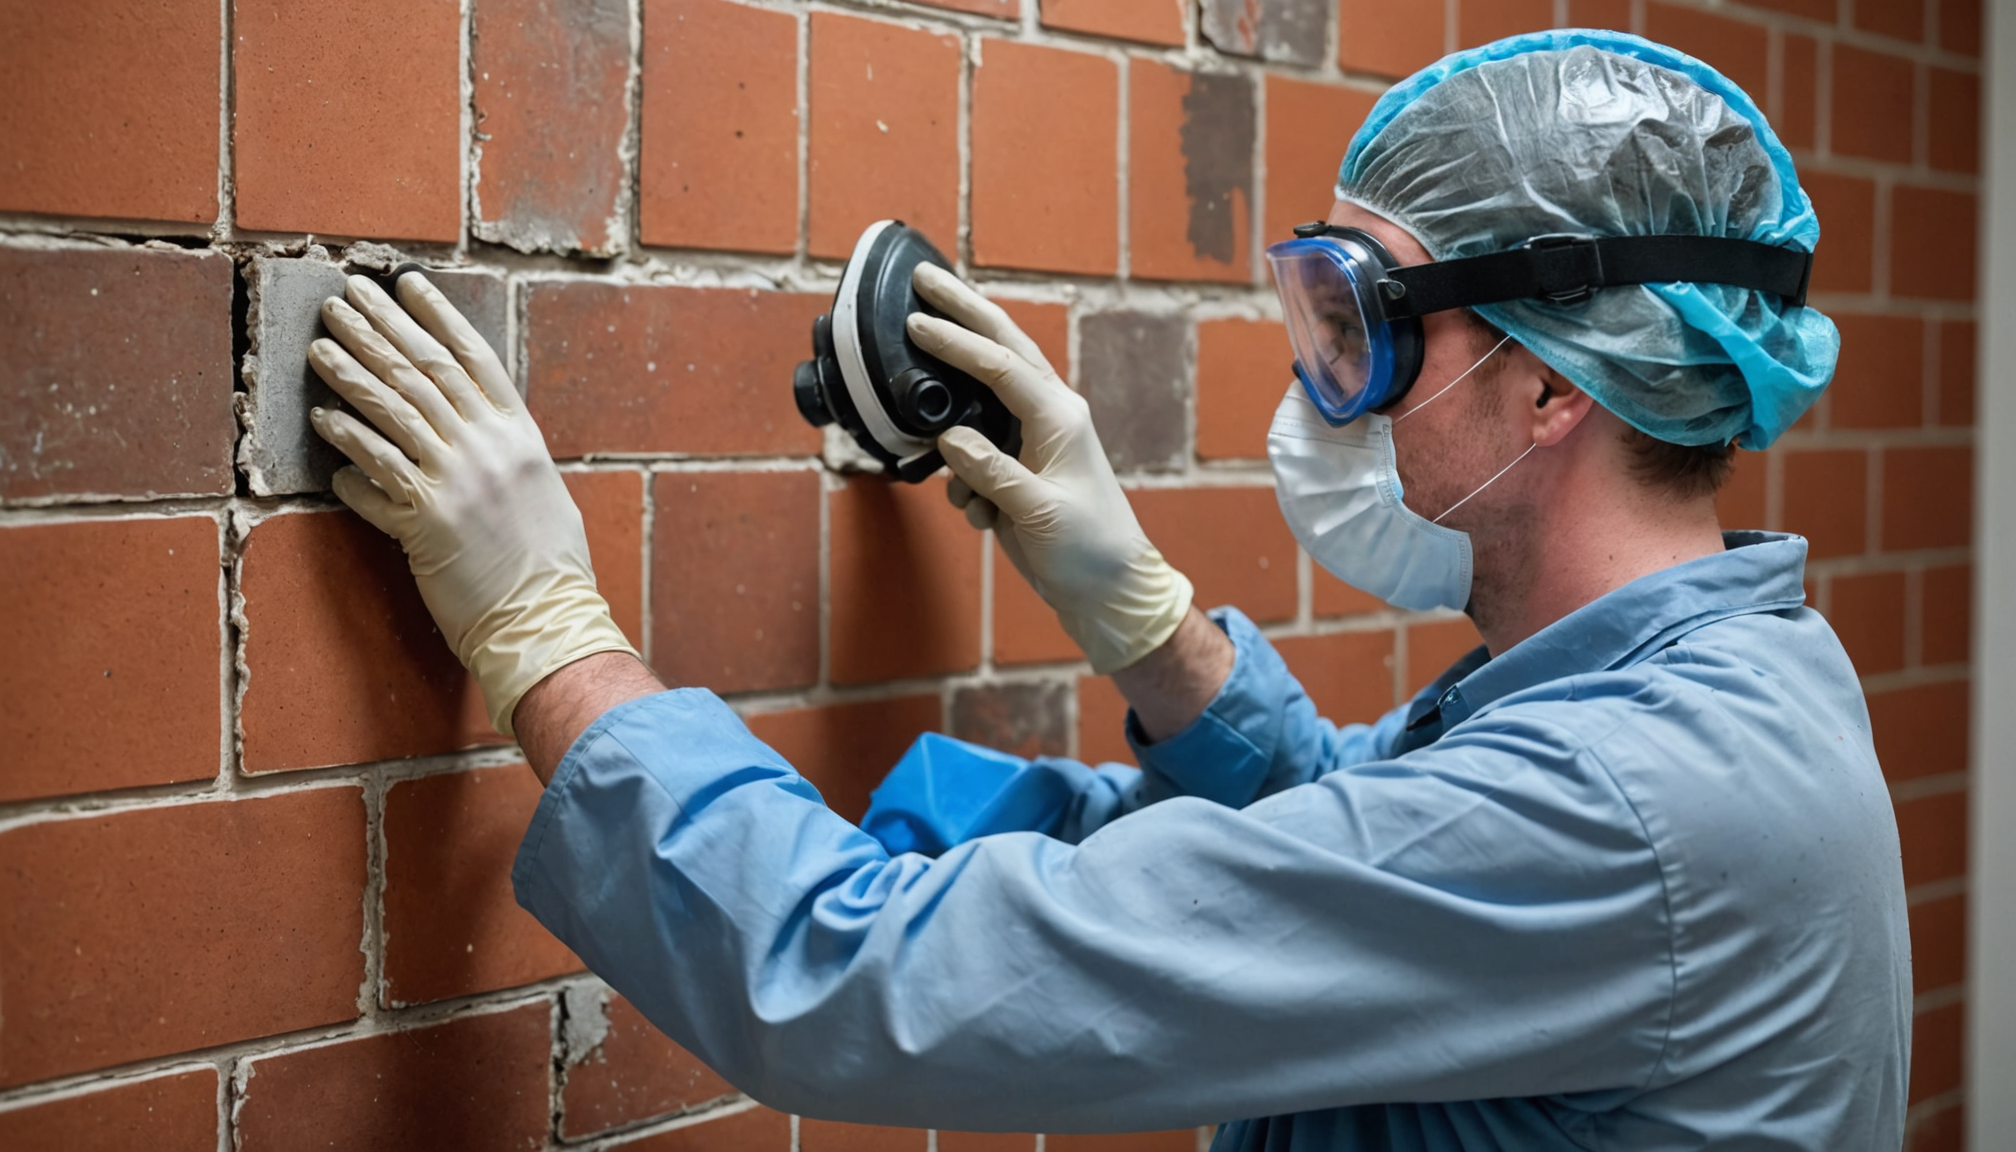
Demolition isn’t merely about swinging a sledgehammer; it’s a careful process of removing old fixtures, flooring, and wall surfaces while leaving essential infrastructure intact. According to the National Kitchen & Bath Association (NKBA), a well-thought-out demolition plan can save homeowners up to 20% in unexpected repair costs. Start by creating a checklist of items to remove, such as old tile, cabinets, and fixtures. Ensure you have the right tools for the job, including safety gear like gloves, goggles, and a dust mask.
Before you begin, it’s essential to understand your bathroom’s layout, especially the locations of plumbing and electrical lines. Experts recommend turning off the water supply and electricity to the bathroom to prevent any accidents. Remove fixtures like toilets, sinks, and showers carefully to avoid damaging the underlying plumbing. If you’re unsure about any step, consult a professional or refer to reliable resources like the Family Handyman, which offers step-by-step guides for DIY projects.
Once the major fixtures are out, focus on the walls and flooring. Remove any existing tile, wallpaper, or paint. This step can be labor-intensive, but it’s necessary to create a clean slate for your new design. Remember, the goal is to expose the studs and subfloor, allowing for a fresh start in the remodeling process.
Throughout the demolition phase, planning is key. Have a clear strategy for waste disposal. Renting a dumpster can streamline the cleanup process, making it easier to discard debris efficiently. Additionally, consider the environmental impact of your demolition. Many materials, such as porcelain fixtures and metal pipes, can be recycled. According to the Environmental Protection Agency (EPA), construction and demolition waste account for a significant portion of the waste stream, so responsible disposal is crucial.
Once the demolition is complete, take a moment to inspect the bare bones of your bathroom. Look for any signs of water damage, mold, or structural issues that need addressing before you proceed with the remodel. Creating a solid base during the demolition and preparation phase sets the stage for a successful bathroom transformation.
Plumbing and electrical work
After the demolition phase, the focus shifts to the intricate task of plumbing and electrical work, which are the backbones of a well-functioning bathroom. These systems need to be in place before moving on to more visible aspects of the remodeling process. Here are some critical steps and tips to ensure this phase goes smoothly.
Before you begin, it’s essential to have a detailed planning and checklist in place. This should include the layout of new plumbing lines, electrical outlets, and any fixtures that require water or power. Consulting a professional at this stage can be highly beneficial, as they can provide insights and ensure everything is up to code.
One of the first tasks is to rough-in the plumbing. This involves installing the main water supply and drain lines to the correct locations as per your new bathroom layout. It’s crucial to check the integrity of existing pipes and replace them if necessary. Remember, making changes to plumbing at this stage is much easier than after the walls are closed up.
- Shut off water and electricity: Ensure that the water supply and electricity to the bathroom are turned off to avoid any accidents. Safety should always be a top priority during this phase.
- Install new piping: Use modern materials like PEX tubing for water supply lines, which are more flexible and easier to install than traditional copper piping. For drains, ABS or PVC pipes are commonly used.
- Electrical wiring: This is the time to install new electrical wiring for outlets, lights, and any additional features like heated floors or exhaust fans. Always follow local building codes and use appropriately rated electrical materials for bathrooms.
- Pressure test plumbing: After installing the new plumbing lines, conduct a pressure test to ensure there are no leaks. This step is crucial as it can save you from costly repairs later.
- Inspection: Before closing up the walls, have a professional inspector check your plumbing and electrical work to ensure everything meets code requirements. This step provides peace of mind and ensures the safety of your remodeling project.
Proper planning and execution during the plumbing and electrical phase lay the groundwork for a successful bathroom remodel. By ensuring all systems are correctly installed and up to code, you set the stage for a functional and safe space that meets all your remodeling goals.
Drywall and subflooring installation
After the plumbing and electrical work is complete, the next step in your bathroom remodel sequence is the installation of drywall and subflooring. This phase is crucial as it creates the surface and structure for your new bathroom design. Common mistakes can occur during this stage, but with careful planning and attention to detail, you can avoid them.
One of the most frequent mistakes is using the wrong type of drywall for the bathroom. Standard drywall is not suitable for areas with high moisture levels, as it can lead to mold growth and deterioration. Instead, opt for green board or cement board, which are moisture-resistant and designed for bathroom use. Green board is suitable for walls and ceilings, while cement board should be used in areas that will have direct contact with water, such as shower and tub surrounds.
Another common error is improper spacing of drywall panels. Ensure that the edges of the drywall panels align with the center of the wall studs or ceiling joists. This provides adequate support and prevents sagging or warping over time. A good planning tip is to create a checklist that includes measuring and marking the stud and joist locations before installation begins.
When it comes to subflooring, avoiding shortcuts is vital. Some homeowners may be tempted to install new flooring directly over the old subfloor without proper preparation. However, it’s essential to inspect the subfloor for any signs of water damage, rot, or structural issues. If necessary, replace the damaged sections with new plywood or oriented strand board (OSB). Proper installation ensures a stable base for your new flooring and prevents future problems.
A frequent oversight is neglecting to seal the seams and edges of the subflooring. This step is crucial in preventing water from seeping underneath and causing damage. Use a water-resistant sealant to fill any gaps and ensure a tight fit between panels. Additionally, consider installing a waterproofing membrane over the subfloor before laying the new flooring, especially in areas prone to water exposure, like around the shower or bathtub.
Another common mistake is not leveling the subfloor. An uneven surface can lead to issues with the final flooring installation, such as tiles not laying flat or vinyl flooring showing imperfections. Use a leveling compound to create a smooth and even surface before proceeding with the flooring installation.
By avoiding these common mistakes and following a well-thought-out checklist, you can ensure a successful drywall and subflooring installation. Taking the time to choose the right materials, properly prepare the surfaces, and pay attention to detail will contribute to a durable and well-functioning bathroom remodel.
Tiling and fixture installation
With the drywall and subflooring installation complete, you’re now ready to move on to the exciting phase of tiling and fixture installation. This step transforms your bathroom, bringing your vision to life and setting the stage for the final touches. Detailed planning and a comprehensive checklist are essential to ensure a successful tiling and fixture installation process.
Tiling:
Begin by choosing the right tiles for your bathroom. The type of tile you choose depends on the area where it will be installed—whether it’s the walls, floors, or shower surrounds. Consider both the aesthetic appeal and the functionality of the tiles. Ceramic and porcelain tiles are popular choices for their durability and water resistance.
Preparation:
Before you start tiling, ensure the surfaces are clean and level. Any dips, bumps, or imperfections should be addressed to avoid visibility through the tiles. Take the time to lay out your tile pattern on the floor or wall to ensure everything fits correctly and make any necessary adjustments.
Installation:
Use a mortar mix specifically designed for tile adhesion. Apply it using a notched trowel to create grooves that help the tiles stick better. Start at the center of the room or wall and work your way out to the edges. This technique helps maintain a balanced and symmetrical pattern.
Cutting Tiles:
Inevitably, you’ll need to cut tiles to fit around fixtures and corners. Use a wet saw for clean and precise cuts. Measure twice and cut once to avoid wasting tiles and ensure a perfect fit.
Grout and Seal:
After the tiles are set, apply grout to fill the spaces between them. Allow the grout to dry according to the manufacturer’s instructions, then apply a sealant to protect the tiles and grout from water and stains.
Fixture Installation:
Plumbing Fixtures:
Install the plumbing fixtures, such as the toilet, sink, and shower. Make sure all connections are properly sealed to prevent leaks. If you’re replacing a toilet, ensure the wax seal is correctly placed and secured.
Lighting Fixtures:
Install any new lighting, ensuring all electrical connections are secure and meet code requirements. This is also the time to install or replace any electrical outlets needed for your bathroom layout.
Vanities and Cabinets:
Install vanities and cabinets, making sure they are level and sufficiently anchored to the walls. Ensure cabinets are properly aligned and doors and drawers operate smoothly.
Shower and Tub:
If you are installing a new shower or tub, make sure the drainage and supply lines are correctly connected. Test the fixtures to ensure proper water flow and drainage.
Planning and Checklist:
Measurements:
Double-check all measurements to ensure tiles and fixtures fit perfectly. Mistakes at this stage can lead to costly delays and rework.
Tools:
Have all necessary tools on hand, including a tile cutter, grout float, sealant, and appropriate plumbing and electrical tools. Keep safety gear like gloves and goggles nearby as well.
Inspection:
Before finalizing the installation, conduct a thorough inspection to ensure everything is securely fixed and properly functioning. A professional inspection is also recommended to ensure compliance with local codes.
Key Takeaways and Actionable Advice:
Tiling and fixture installation is a critical phase that ties your entire bathroom remodeling project together. Careful planning, accurate measurements, and meticulous execution are key to achieving a polished and functional bathroom.
Actionable Advice:
– Measure Twice, Cut Once: Accurate measurements prevent costly mistakes.
– Choose the Right Materials: Use tiles and fixtures designed for bathroom use to ensure durability and function.
– Professional Inspection: Have a professional inspect your work to ensure everything meets code requirements.
Motivational Tone:
With each tile placed and fixture installed, your bathroom takes shape, transforming into the space you’ve always envisioned. Every step brings you closer to completing your remodel and enjoying your beautifully designed, functional bathroom. Keep going, and soon, you’ll be able to appreciate the fruits of your labor.
Final touches and cleanup
- I’ve finished installing my fixtures and tiles. What’s the next step in my bathroom remodel?
- After fixture and tile installation, focus on the final touches and cleanup. This includes painting, decorating, and ensuring everything is clean and functional.
- Why is a cleanup phase necessary after a bathroom remodel?
- Cleanup is crucial to remove any construction debris, dust, and residue, ensuring your bathroom is safe, clean, and ready for use.
- What should be included in my final touches checklist for the bathroom remodel?
- Your checklist should include tasks like caulking around fixtures, touching up paint, installing bathroom accessories, and a thorough final cleaning.
- How can I ensure my remodeled bathroom is safe to use after the project is complete?
- Conduct a safety inspection to ensure all fixtures are properly secured, electrical outlets are functioning and safe, and there are no hazards like loose tiles or leaks.
- What should I do with leftover materials and debris from my bathroom remodel?
- Dispose of waste responsibly by recycling or donating usable materials. Consider hiring a waste removal service for larger debris, and always follow local regulations for disposal.