In maintaining a functional kitchen, attention to small details like caulking can save both time and money. Over time, caulk around your kitchen sink may degrade, leading to unsightly gaps or even leaks, which can cause water damage. Replacing worn-out caulk is a straightforward way to enhance hygiene and ensure water protection in your kitchen, helping to preserve your countertops and cabinets.
The first step towards replacing old caulk is gathering the necessary tools and materials. For this project, having the right supplies on hand is crucial to tailoring the process to your specific kitchen needs, ensuring a neat, effective, and durable finish.
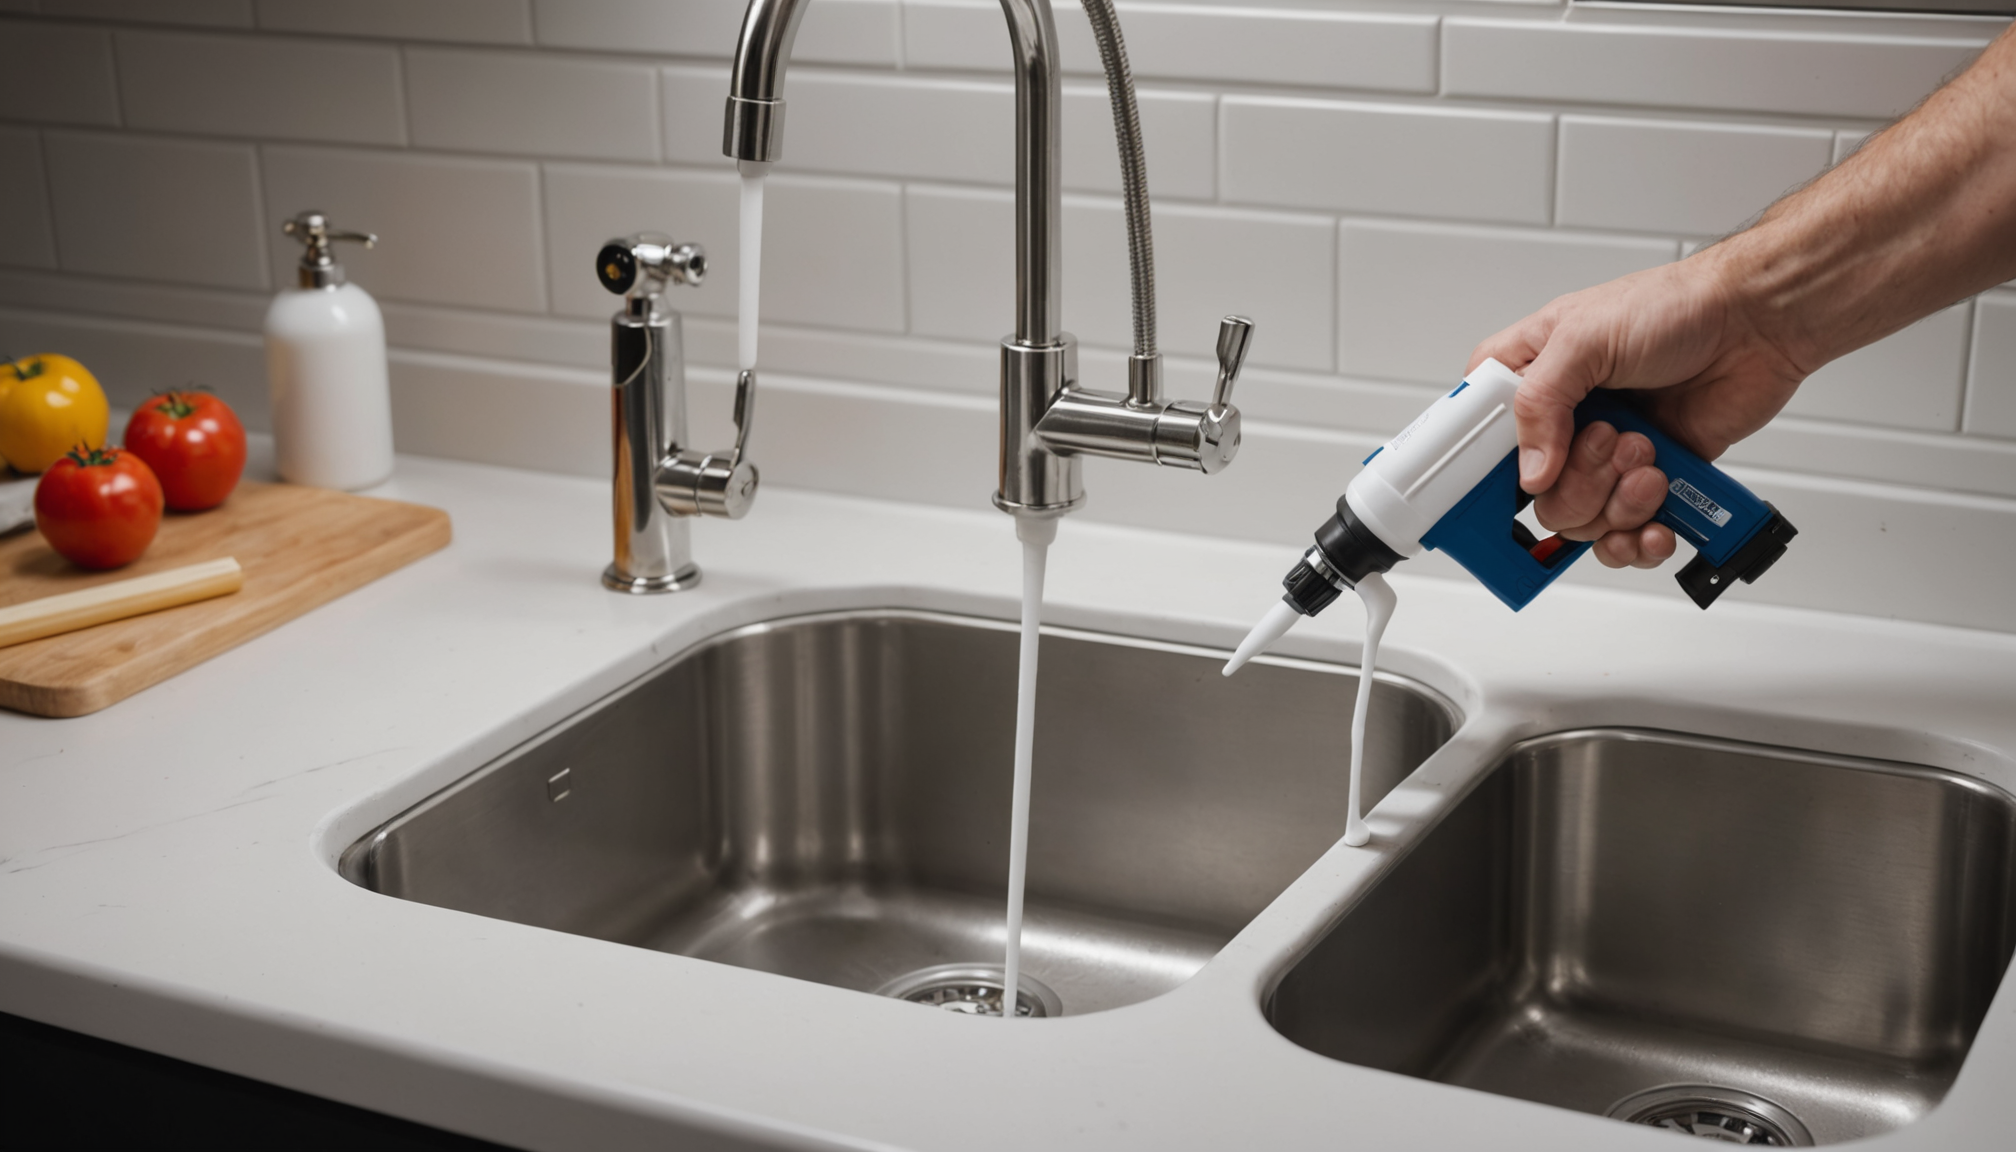
Start by gathering the essentials. The key tool in this process is a high-quality caulk gun. Opt for a smooth rod caulk gun, which offers a more even application and reduces hand fatigue compared to a ratchet rod model. This tool is indispensable for precision in applying the new caulk, ensuring a smooth, consistent bead around your sink.
Next, selecting the right type of caulk is paramount. For kitchen maintenance, silicone or latex-based caulks are generally recommended. Silicone caulk is waterproof and flexible, making it ideal for areas frequently exposed to water and temperature changes. Latex-based caulk, on the other hand, is easier to apply and clean up if you’re a beginner. Both types are available in a variety of colors, allowing you to match your kitchen décor seamlessly.
In addition to the caulk gun and caulk, you’ll need several other materials. A utility knife or caulk remover tool will help in extracting the old caulk, while a putty knife or scraper can assist in smoothing out the caulk once applied. Ensure you have painter’s tape to define clean lines and protect surrounding areas, and a cleaning solution, like alcohol or a commercial cleaning agent, to ensure the surface is free of any grease or debris for optimal adhesion.
While these are the core materials and tools you will need, consider having a few other items on hand for added convenience. A bucket of water and rags can aid in cleaning up any spills or excess caulk. For measuring, use a ruler or tape measure to ensure a precise application if your sink area features unique angles or extensive caulking.
By gathering these tools and materials in advance, you’ll be well-prepared to tackle the caulking project efficiently, minimizing downtime and interruptions. As mentioned by experts at the Family Handyman, proper preparation is instrumental to quick and successful completion of home improvement tasks, especially for novices attempting DIY kitchen maintenance. With everything in place, you’re ready to proceed to the next step: preparing the area for caulking.
Preparing the area for caulking
Before beginning the caulking process, it’s crucial to properly prepare the area around your kitchen sink to ensure the new caulk adheres effectively and provides a lasting seal. Start by clearing the sink area of any items, such as dish racks, soap dispensers, or other kitchen accessories, to avoid any unintended obstructions or damage during the process. This step not only facilitates easy access but also prevents any accidental contact with new caulk later.
Once the area is cleared, clean the surface thoroughly. Use a cleaning solution, such as isopropyl alcohol or a commercial kitchen cleaner, to remove any grease, dirt, or residues. It’s imperative to ensure the surface is completely clean and dry, as lingering moisture or oils can inhibit the caulk from adhering properly. Take your time with this step; effective cleaning is foundational to water protection and ensures the longevity of your kitchen maintenance efforts.
Next, evaluate the state of the existing caulk. For heavily grimy or mold-infested areas, consider using a mold remover before proceeding with further steps. This is essential, as baking mold or mildew traps moisture, compromising the new caulk.
After you’ve cleaned and assessed the old caulk, apply painter’s tape along both sides of where you intend to caulk. This technique helps create straight lines and protects the sink and countertop surfaces from accidental caulk smears, resulting in a neat and professional finish. The tape acts as a guide and also prevents excess caulk from spreading onto unwanted areas.
Lastly, have your tools within arm’s reach to facilitate a smoother workflow. A caulk remover, utility knife, or putty knife will be essential for removing the old caulk without damaging your countertop or sink.
By dedicating time to these preparatory steps, you lay the groundwork for an effective caulking process, ensuring optimal adherence and water protection that will prolong the integrity of your kitchen sink area.
- Clear the sink area of any items to avoid obstructions and damage during caulking.
- Thoroughly clean the surface with alcohol or a dedicated cleaner to remove grease and residues.
- Apply painter’s tape along edges to ensure clean, professional lines and protect nearby surfaces.
- Remove existing caulk carefully using a caulk remover or utility knife to avoid damaging fixtures.
- Ensure the area is completely dry to improve the adhesion and longevity of the new caulk.
Removing the old caulk
When it comes to removing the old caulk, this step is crucial to achieving a durable and tidy result for your kitchen maintenance. However, it’s easy to fall into common pitfalls that can undermine your efforts in water protection and lead to further issues. Understanding these mistakes and how to sidestep them will help ensure a successful caulking project.
One typical mistake is being too aggressive or using the wrong tools when removing old caulk, which can damage the surfaces around your sink. While it’s essential to remove all the deteriorated material, rushing or applying excessive force can scratch or chip the countertops or the sink itself. To avoid this, use a specialized caulk remover tool or a utility knife carefully and patiently. Aim for a soft grip and gradual pressure to loosen the caulk without harming the surrounding areas. Working at a shallow angle can also help prevent gouging surfaces.
Another pitfall is neglecting to soften the old caulk before removal, especially if it has been there for a long time and has become hard and brittle. Many DIY-ers skip this step, complicating the removal process and increasing the risk of surface damage. Use a commercial caulk softener or make a DIY mixture of warm water and vinegar to gently soften the caulk, making it easier to peel away without force.
It’s also a mistake not to remove all traces of the old caulk. Leaving behind remnants of the old material can impede the adhesion of the new caulk, leading to future leaks. After manually removing the bulk of the old caulk, go over the area again with your tool or a putty knife to scrape away any remaining bits. Clean the area with isopropyl alcohol to dissolve any leftover residue, ensuring a clean surface for re-caulking.
Finally, avoid rushing the drying process. Once the old caulk is out, it’s imperative to allow the area to dry completely. Persistent moisture can prevent the new caulk from adhering properly, compromising its seal and effectiveness in water protection. Be patient and, if necessary, use a fan or allow ample time for air drying before proceeding.
Being mindful of these common mistakes can significantly enhance the outcome of your caulking project. Removing the old caulk correctly sets a solid foundation for applying the new material, contributing to effective water protection and the overall longevity of your kitchen maintenance efforts.
Applying the new caulk
Applying the new caulk is a pivotal step in the kitchen maintenance process, ensuring effective water protection and preventing damage to your beloved sink area. Before you begin, make sure the surfaces are completely dry, as moisture can compromise the caulk’s ability to adhere properly. Once you’re certain that the area is dry, it’s time to gear up for a neat and professional application.
Start by carefully loading your chosen caulk into the caulk gun. Position the cartridge in the gun by pulling back the plunger, inserting the tube, and then pushing the plunger snugly against the back. Align the nozzle, which should be cut at a small angle for precision, with the seam where the sink meets the countertop.
To begin caulking, hold the gun at a consistent angle, approximately 45 degrees, and apply steady pressure on the trigger to extrude the caulk smoothly. Move at a moderate and even pace, ensuring that the bead of caulk is continuous and without breaks. This steady application prevents gaps that could lead to water seepage and undermines the caulk’s role as a barrier in water protection.
As you apply the caulk, the bead should cover the entire seam edge to edge without overflowing onto the surrounding surfaces. If any excess spills over, don’t worry; aim to work methodically rather than quickly. Clean up any spills promptly with a damp rag to prevent them from hardening and complicating the cleanup process.
Once the caulk is applied, it’s time to smooth it for a clean, professional finish. Use a caulk finishing tool or your wet finger to gently press the caulk into the seam. This not only enhances adhesion but also eliminates any air pockets and ensures a watertight seal. Repeated light passes over the caulk should give it a smooth, even appearance while removing any excess caulk in the process.
Finally, remember to carefully remove the painter’s tape that you previously applied. Do this while the caulk is still wet to avoid pulling and disrupting the freshly laid line of caulk—a step that’s paramount in achieving those crisp, straight edges synonymous with professional work.
Taking meticulous care during this process not only fortifies your kitchen against future water damage but also prolongs the life and aesthetics of your kitchen. With careful application and an eye for detail, your efforts will result in a lasting and visually pleasing seal. Embrace this opportunity for kitchen maintenance as a way to cultivate a skill that keeps your home in top shape, ensuring a healthy and durable workspace.
Final touches and cleanup
Once you’ve successfully applied the new caulk and allowed it to set, it’s time to focus on the final touches and cleanup process to ensure your kitchen sink area is pristine and ready for use. Begin by inspecting the newly caulked seams to ensure there are no gaps or uneven areas. If there are any imperfections, a gentle smoothing with a caulk finishing tool or a damp finger can often correct these areas while the caulk is still manageable, applying light pressure to achieve a solid seal.
Next, carefully remove any remaining painter’s tape from the edges, ensuring you do this while the caulk is still wet. Doing so helps maintain the crispness of the caulk lines and prevents any accidental lifting of the newly applied seal, which is crucial for maintaining optimal water protection in your kitchen.
It’s equally important to clean the nearby surfaces of any leftover caulk smudges or residue. Use a gentle cleaner that’s appropriate for your countertop surface, whether it’s granite, laminate, or quartz, and a soft cloth to wipe away any excess caulk. This attention to detail not only contributes to a polished finish but also ensures that your kitchen maintenance efforts are visually pleasing and professionally executed.
Once the caulk has had sufficient time to cure based on the manufacturer’s instructions—typically 24 hours—you may resume using your sink area. Be sure to check the cured caulk to ensure it’s properly adhered and forms a waterproof, protective barrier against leaks.
Finally, clean your tools thoroughly for future use. Wipe down your caulk gun and any finishing tools with a moist cloth to remove any residual caulk. Proper maintenance of these tools will prolong their life and ensure they are ready for the next time you undertake a home improvement project.
The diligence applied in your kitchen maintenance routine will not only protect against water damage but will also uphold the aesthetic integrity of your kitchen for years to come. Your careful attention to detail in these final steps ensures that your reinvigorated sink area is both functional and attractive.
- Why do I need to replace the caulk around my kitchen sink?
- Replacing the caulk around your kitchen sink is essential for preventing water leaks, which can lead to mold growth and damage to counters and cabinets. Fresh caulk also ensures a clean, polished look and maintains the integrity of your kitchen surfaces.
- How often should I replace the caulk around my sink?
- It is generally recommended to replace the caulk around your sink every 3 to 5 years, or as soon as you notice it cracking, peeling, or becoming discolored. Checking routinely allows for timely maintenance, avoiding water damage and maintaining optimal water protection.
- What type of caulk is best for kitchen sinks?
- Silicone caulk is highly recommended for kitchen sinks due to its waterproof properties and flexibility to withstand kitchen conditions. Alternatively, latex-based caulk is user-friendly and easy to clean if silicone caulk isn’t your first choice, but may not last as long.
- Is it necessary to completely remove the old caulk before applying new caulk?
- Yes, completely removing all the old caulk is crucial to ensure the new caulk adheres properly. Any remaining old caulk can prevent proper adhesion and result in a poor seal, which can compromise water protection.
- How long does it take for new caulk to dry and cure?
- Drying times for caulk can vary, but it’s generally advisable to allow at least 24 hours for the caulk to fully cure before exposing it to water. Always check the manufacturer’s instructions for specific drying and curing recommendations.