Before starting this outdoor fencing repair project, gathering all the necessary tools and materials will make the job smoother and prevent multiple trips to the hardware store. This DIY project requires both basic and specialized equipment to ensure proper removal and installation.
For demolition and removal:
- Sledgehammer (8-12 pounds)
- Heavy-duty digging bar or post hole digger
- Shovel (both pointed and flat)
- Reciprocating saw with wood and metal blades
- Work gloves and safety glasses
- Wheelbarrow for debris removal
For installation:
- Level (2-foot and 4-foot recommended)
- Tape measure
- String line
- Post hole digger or power auger
- Mixing tub or wheelbarrow
- Concrete mixing hoe
- Garden hose for water access
- 2×4 boards for bracing
Required materials:
- New fence post (pressure-treated lumber recommended)
- Fast-setting concrete mix (approximately 2-3 bags per post)
- Gravel for drainage (about 6 inches worth)
- Galvanized screws or nails
- Wood preservative for cut ends
According to the American Wood Protection Association (AWPA), using pressure-treated lumber rated for ground contact is essential for fence posts, as it provides protection against decay and insect infestation for 20-30 years. Professional contractors, as cited in Fence Industry Statistics, report that having the right tools can reduce installation time by up to 40% and significantly improve the quality of the finished project.
Removing the old post and concrete
Begin by disconnecting any fence panels or rails attached to the damaged post using a pry bar or drill to remove fasteners. For a more controlled outdoor repair process, cut the old post as close to ground level as possible using a reciprocating saw, which makes the subsequent removal easier to manage.
Next, dig around the concrete footer using a shovel, creating a perimeter approximately 6-8 inches away from the concrete. Work your way down, exposing the entire concrete base. If the soil is particularly hard, use water to soften it, making the digging process more manageable. Once you’ve exposed the sides of the concrete, use the digging bar to loosen it by working it back and forth.
For stubborn concrete footings, break them into smaller pieces using a sledgehammer while they’re still in the ground. This DIY fencing technique makes removal more practical and reduces the risk of strain or injury. Rock the remaining post and concrete base back and forth using the digging bar as leverage until it becomes loose enough to lift out.
Remove all concrete debris and old post fragments from the hole, placing them in a wheelbarrow for disposal. Check the hole’s sides for any remaining concrete pieces that might interfere with the new installation. If the old post has rotted below ground, ensure all decomposed wood material is cleared out to prevent future soil settling.
- Breaking the concrete into smaller pieces while still in the ground makes removal significantly easier and safer
- Cutting the post at ground level first provides better leverage and control during the removal process
- Water can be used to soften hard soil around the concrete, making digging and removal less strenuous
- Always inspect the hole for remaining concrete fragments or rotted wood before proceeding with new post installation
Preparing the new hole
Begin by measuring the hole’s width and depth to ensure proper dimensions. For optimal stability in outdoor fencing, the hole should be approximately three times the width of your post and extend below the frost line for your region. A common DIY mistake is digging a hole that’s too shallow, leading to post heaving during freeze-thaw cycles.
Clean the sides of the hole thoroughly, removing any loose soil or debris. Many people overlook this crucial step, but ragged or sloping sides can compromise the concrete’s grip. Use a post hole digger to create crisp, vertical walls, ensuring the concrete will form a solid cylinder around your post.
Before proceeding with the repair, check that the bottom of the hole is level. A frequent error is assuming the hole bottom is flat without verification, which can cause the post to sit at an angle. Compact the soil at the bottom using a tamping tool or the end of your digging bar. Add about 6 inches of gravel for drainage – skipping this step is a common mistake that leads to premature post rot.
Test the hole depth by temporarily placing your new post inside. The post should sit high enough to match the height of adjacent fence sections while maintaining adequate depth for stability. Many DIYers make the error of eyeballing this measurement, only to discover their post is too short or tall after the concrete sets.
Key points to avoid common mistakes:
– Don’t skip measuring the hole’s depth relative to the frost line
– Ensure hole width is three times the post diameter
– Always compact the base soil before adding gravel
– Check hole alignment with existing fence line using string
– Verify vertical walls are clean and properly shaped
– Make sure the hole bottom is level and free of organic material
Remember that proper hole preparation accounts for about 50% of your fence post’s long-term stability. Taking extra time during this phase prevents costly repairs in the future.
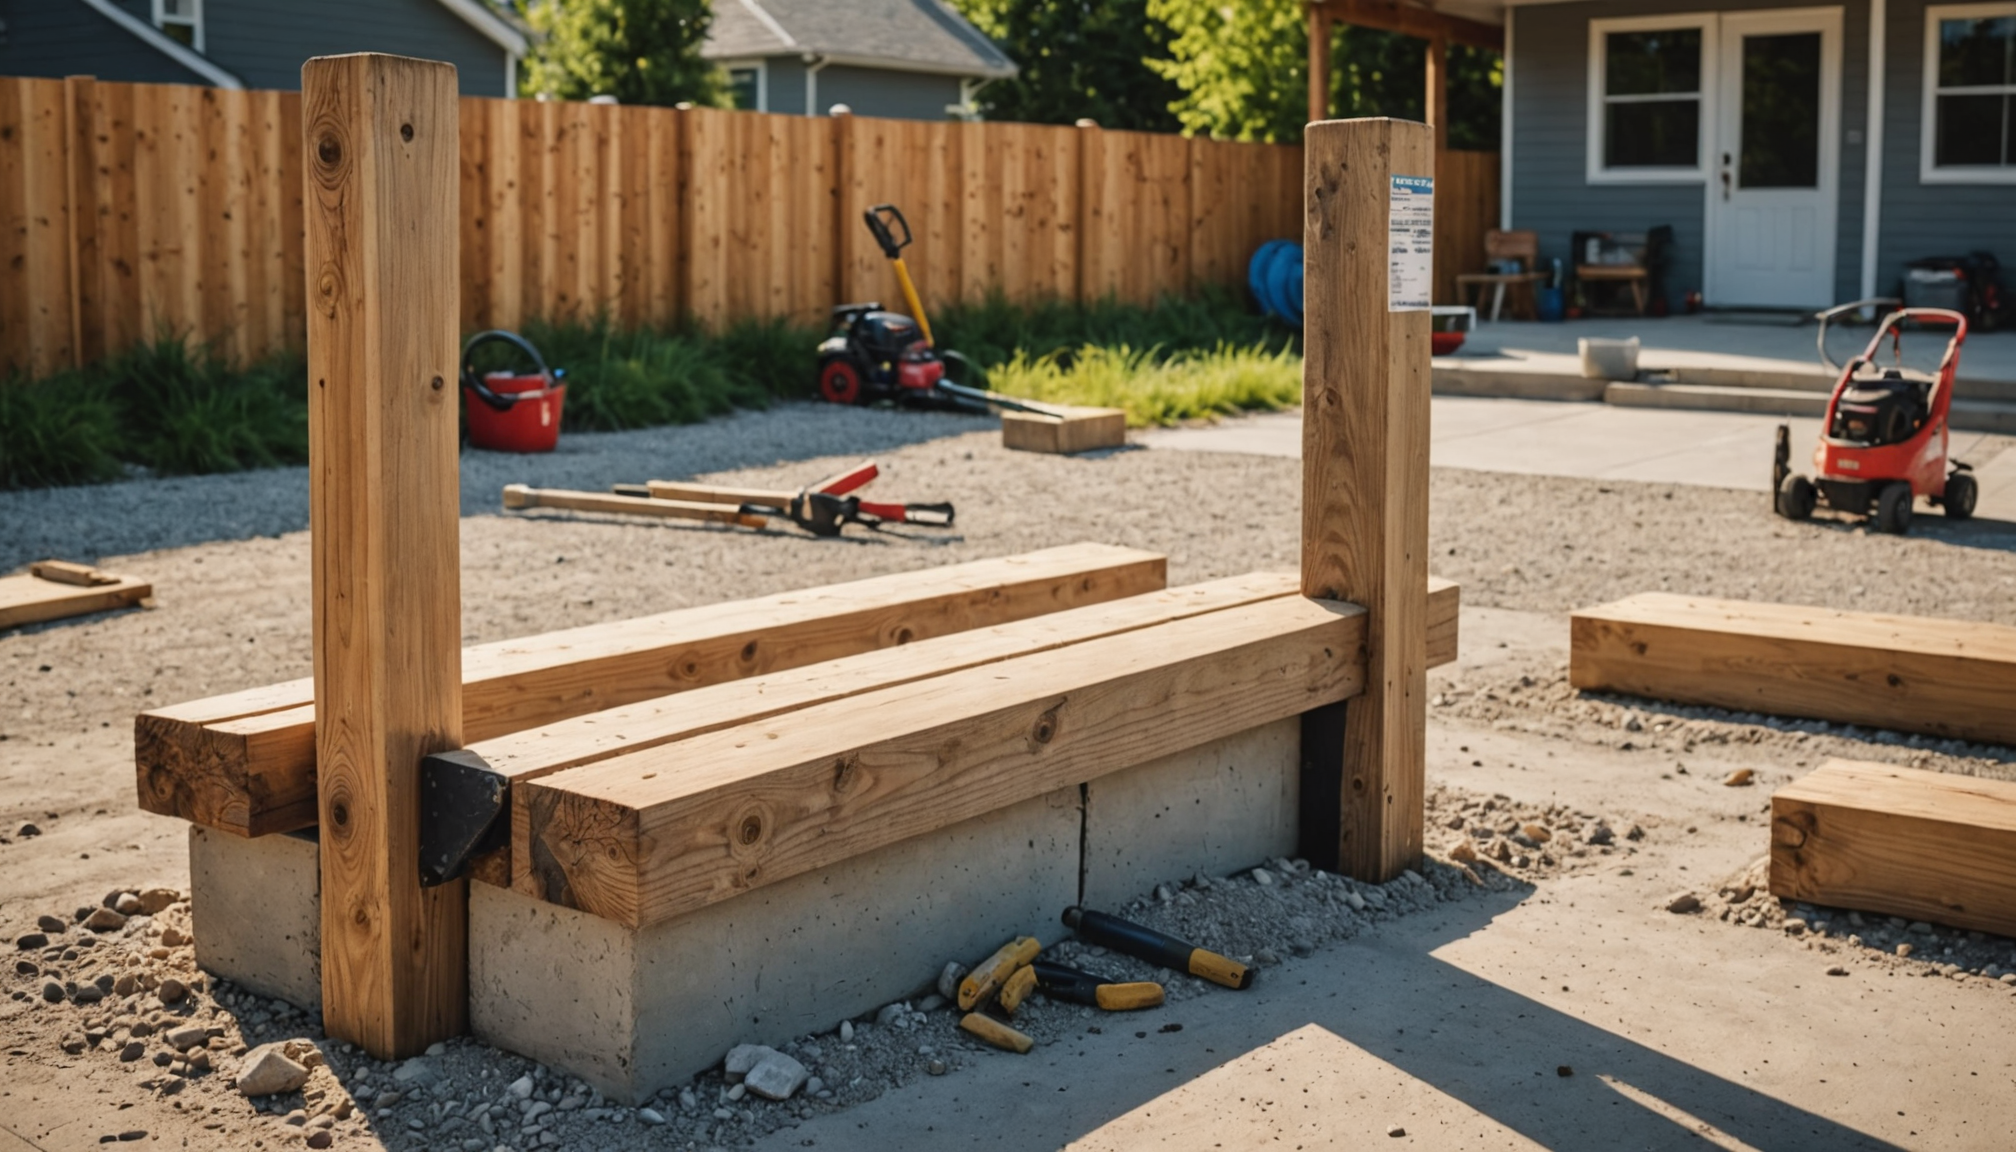
Setting the replacement post
Start by inserting the new post into the prepared hole, keeping it a few inches above the gravel base. For this outdoor fencing repair, proper positioning is crucial – the post should align perfectly with existing fence sections while maintaining consistent height and spacing. Use a string line stretched between adjacent posts to ensure proper alignment within your fence line.
Support the post temporarily using two 2×4 braces positioned at right angles to each other. Secure these braces to the post with screws, and stake the opposite ends into the ground. This DIY technique allows for easy adjustments before the concrete sets. Check the post’s position using a 4-foot level on two adjacent sides to ensure it’s perfectly plumb (vertical).
Measure the distance between posts to maintain consistent spacing – typically 6 to 8 feet depending on your fence design. Double-check that the top of the post matches the height of adjacent posts using a string line or level. A common mistake is rushing this step, resulting in an uneven fence line that’s difficult to correct once the concrete sets.
Fine-tune the post’s position by:
– Checking plumb on all sides repeatedly
– Verifying alignment with string line
– Confirming proper height
– Ensuring braces are secure and sturdy
– Maintaining equal spacing between posts
– Testing that the post sits firmly on the gravel base
The precision of your post placement directly impacts the fence’s appearance and structural integrity. Take time to make minor adjustments now, as they’ll be impossible to correct once the concrete hardens. Consider marking the desired post height with a pencil line, making it easier to maintain proper elevation during the concrete pour.
Remember that patience during this phase pays off with a professional-looking result. A properly set post will ensure your fence panels fit correctly and remain stable for years to come. With the post secured and checked for proper positioning, you’re ready for the next crucial step of adding concrete.
Mixing and pouring fresh concrete
For this crucial outdoor fencing stage, begin by mixing the concrete according to the manufacturer’s instructions in your wheelbarrow or mixing tub. Most DIY repair projects require 2-3 bags of fast-setting concrete per post. Add water gradually while mixing to achieve a consistency similar to thick oatmeal – not too wet or too dry. Avoid mixing more concrete than you can use within 20-30 minutes.
Pour the concrete mixture into the hole in stages, starting with filling it about one-third full. Use a long stick or piece of rebar to tamp the concrete, eliminating air pockets that could weaken the foundation. Continue adding concrete in layers, tamping between each addition, until the concrete reaches about 3-4 inches below ground level. This space allows for soil coverage and grass growth.
Slope the concrete surface slightly away from the post to direct water runoff. Double-check the post’s plumb with your level during the entire pouring process, as the weight of the concrete can shift the post position. Make any necessary adjustments while the concrete is still workable.
- How long should I wait before removing the braces?
- Fast-setting concrete typically sets within 20-40 minutes, but wait at least 4 hours before removing braces. For maximum strength, allow 24-48 hours before attaching heavy fence panels.
- What if it starts raining while the concrete is setting?
- Light rain won’t significantly affect the concrete once it’s started to set. However, protect fresh concrete from heavy rain for the first 2-3 hours using a tarp or plastic sheeting.
- Can I mix the concrete directly in the hole?
- While some people do this, it’s not recommended as it can result in uneven mixing and weak spots. Always pre-mix concrete in a wheelbarrow or mixing tub for consistent strength.
- How can I tell if I’ve added the right amount of water to the concrete mix?
- The concrete should be firm enough to hold its shape when squeezed but wet enough to be workable. If it’s too soupy or too dry, the final strength will be compromised.
- Should I water the concrete while it cures?
- For optimal curing, keep the concrete moist for the first 48-72 hours by misting it with water several times a day. Cover with plastic sheeting between watering to prevent rapid moisture loss.
Post-installation adjustments
Once the concrete has initially set (typically after 4 hours), it’s time to make the final adjustments to ensure your outdoor fence repair will stand the test of time. Start by carefully checking the post alignment using your levels and string line. While the concrete is still slightly workable, you can make minor adjustments if needed by gently pressing against the post.
Remove any excess concrete that may have splashed onto the post during installation. A wire brush works well for this DIY task while the concrete is still semi-soft. This prevents unsightly concrete residue from permanently bonding to your fence post.
Monitor the concrete curing process over the next 24-48 hours. During this time:
– Keep the concrete moist by periodically misting it with water
– Maintain the braces in place to prevent any movement
– Protect the setting concrete from extreme temperatures
– Keep pets and children away from the work area
After 24 hours, test the post’s stability by applying gentle pressure in different directions. If there’s any movement, leave the braces in place for an additional day. Once you’re confident the concrete has fully cured, remove the temporary braces and fill the remaining space at the top of the hole with soil, sloping it slightly away from the post for proper drainage.
Before attaching any fence panels or rails, apply a coat of wood preservative to any cut ends or areas where you’ve drilled holes. This extra protection helps prevent moisture from penetrating the wood and extends the life of your fencing repair project.
Note that weather conditions can affect curing time – in cold or damp weather, you may need to wait longer before adding the full weight of fence panels. Professional fencing contractors recommend waiting a full 48 hours in less-than-ideal conditions to ensure maximum strength.