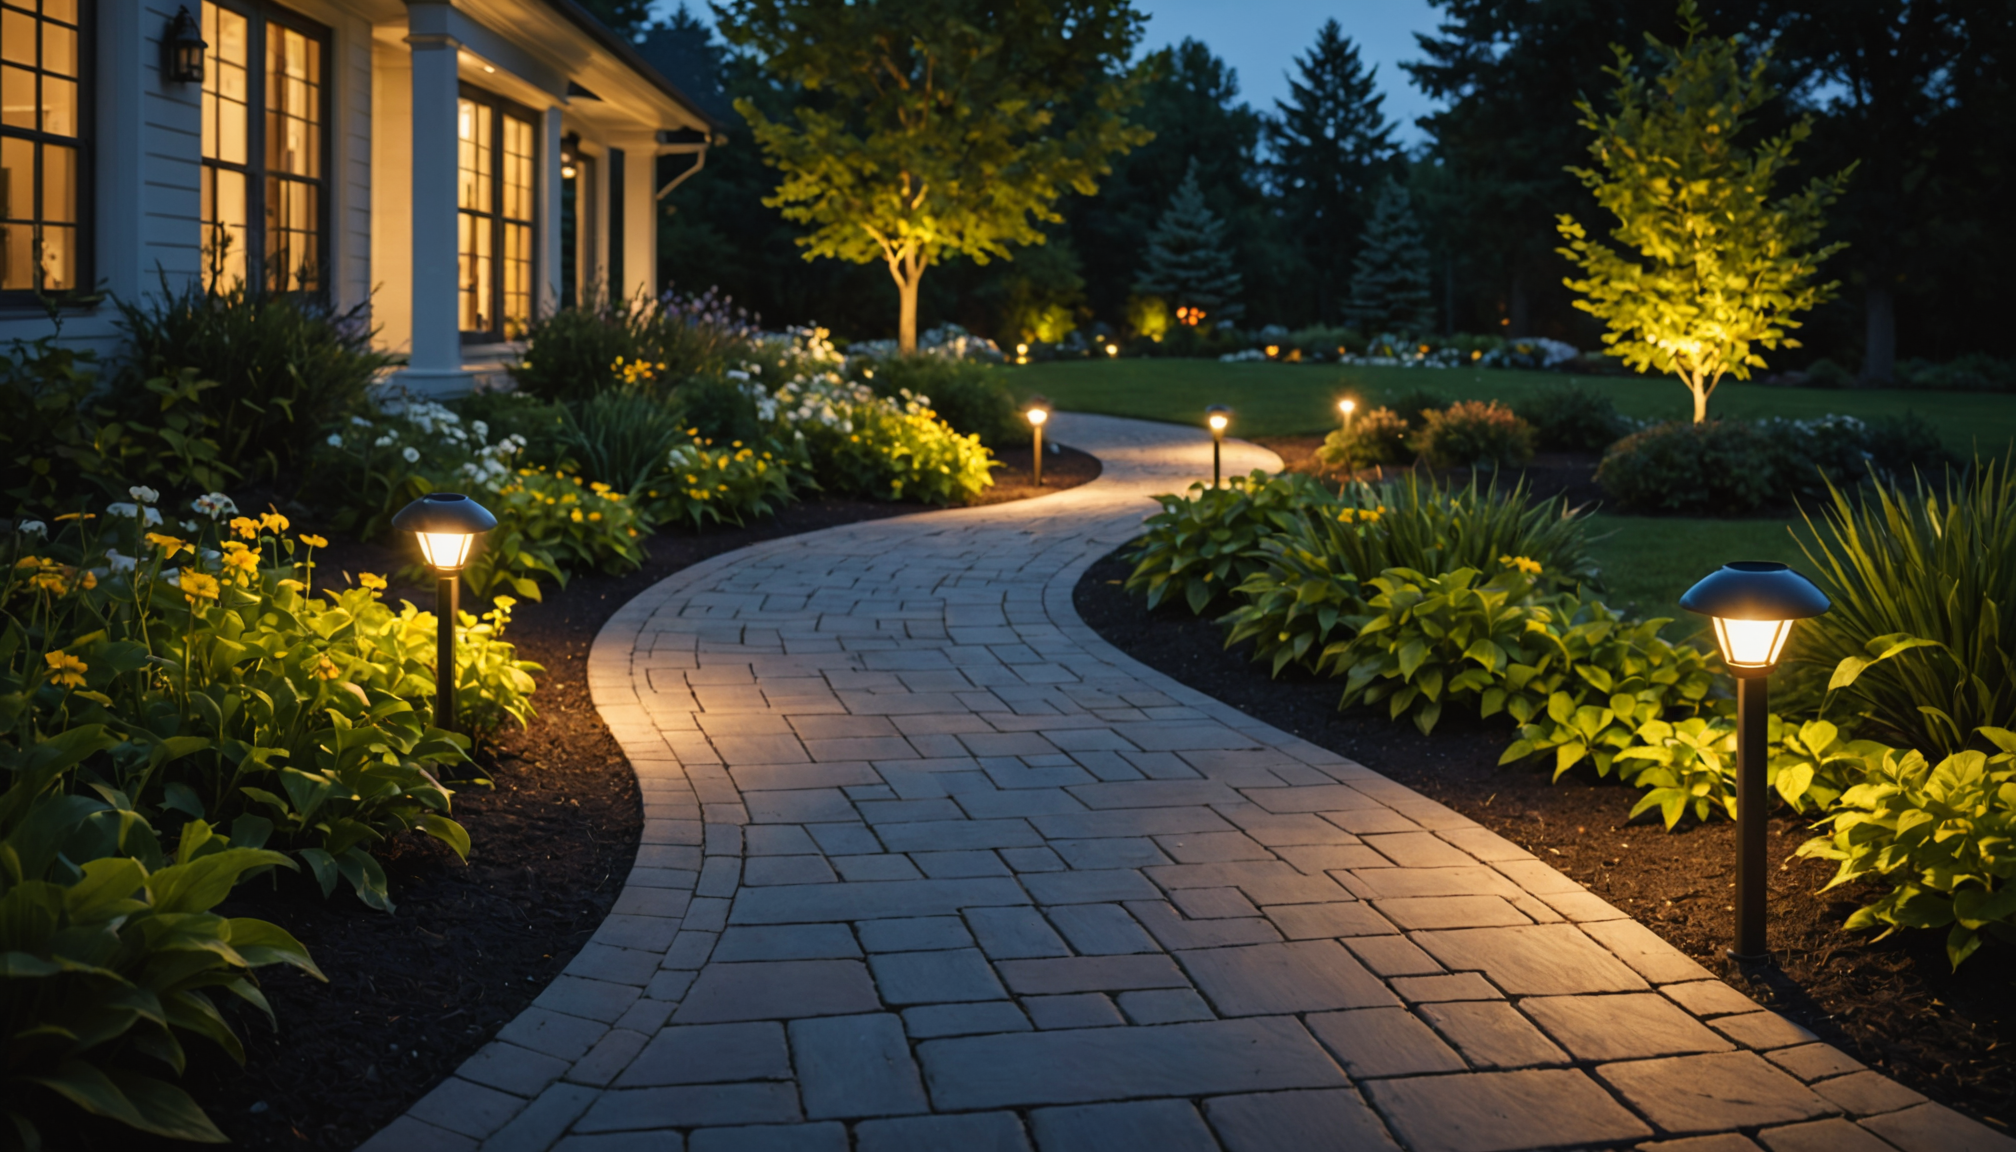
Achieving the perfect balance of illumination along your pathway requires careful consideration of light spacing. According to the Illuminating Engineering Society (IES), outdoor pathway lighting should provide approximately 1 foot-candle of illumination for safe navigation. To achieve this, solar path lights typically need to be placed 6 to 8 feet apart, though this can vary depending on the specific light model’s brightness and beam spread.
Professional landscaper Mark Thompson of Green Light Designs suggests using the “rule of three” when spacing solar lights: measure the diameter of light cast by a single fixture, multiply it by 1.5, and use that as your spacing distance. For example, if your light creates a 4-foot circle of illumination, optimal spacing would be about 6 feet apart. This creates a subtle overlap in lighting patterns while avoiding dark spots between fixtures.
For curved pathways, closer spacing on the bends (about 4-5 feet apart) helps maintain consistent illumination throughout the walking area. The U.S. Department of Energy recommends that pathway lighting should provide enough overlap to ensure continuous illumination without creating harsh spotlight effects or leaving dark zones where someone might trip.
- Straight paths: Space lights 6-8 feet apart
- Curved sections: Reduce spacing to 4-5 feet
- Steps or elevation changes: Place lights 3-4 feet apart
- Wide paths (over 4 feet): Consider staggering lights on both sides
Testing your layout during different weather conditions is crucial. Solar lights typically operate at 40-60% of their rated brightness on cloudy days, according to Energy Star data. Therefore, spacing that works perfectly on clear nights might need adjustment for consistent illumination throughout varying weather conditions. Many professional installers recommend initially placing your lights closer together than you think necessary, then adjusting their position over several nights to achieve optimal coverage.
Best spots for solar path lights
Strategic placement of solar path lights can transform your outdoor spaces into safely navigable and aesthetically pleasing areas after dark. Entranceways deserve particular attention, with lights positioned on both sides to create a welcoming atmosphere while clearly marking the path’s beginning. The transition points where walkways meet driveways or intersect with other paths are crucial spots that require proper illumination to prevent accidents and provide directional guidance.
Steps and changes in elevation are priority locations for pathway lighting. Installing solar lights at each step level ensures safe navigation during nighttime hours. For maximum visibility, position lights slightly offset from the steps rather than directly in line with them, which helps eliminate harsh shadows that could obscure the edges.
Garden features and architectural elements along your paths present perfect opportunities for strategic light placement. Position solar lights near decorative elements like statues, fountains, or distinctive plants to create subtle highlighting effects while maintaining practical path illumination. Near seating areas, integrate lighting to provide both ambiance and functionality, ensuring people can safely access these spaces after sunset.
- Place lights at path intersections and direction changes to guide navigation
- Install fixtures 18-24 inches from path edges for optimal ground coverage
- Position lights near potential hazards like steps, roots, or uneven surfaces
- Avoid blocking lights with tall plants or landscaping features that could create shadows
Security considerations should also influence light placement. Areas where shadows naturally collect or spots with dense vegetation benefit from additional lighting. According to outdoor security experts, well-lit pathways can deter unwanted visitors while providing peace of mind for homeowners and guests using the paths after dark. Remember to consider how your lighting choices might affect neighbors – position solar lights to illuminate your paths without creating light pollution or glare that could disturb adjacent properties.
Considering ground conditions and slopes
A common mistake homeowners make is underestimating the impact of ground conditions when installing outdoor pathway lighting. Installing solar lights in loose or sandy soil often leads to fixtures tilting or falling over time. To prevent this, use stabilizing stakes or consider embedding lights in concrete footings for particularly unstable areas. The U.S. Landscape Architecture Association recommends testing soil stability by inserting a garden stake – if it wobbles easily, additional anchoring will be necessary.
Sloped pathways present unique challenges for solar light placement. Many people make the error of installing lights perpendicular to the slope, which results in crooked illumination patterns and reduced light collection efficiency. Instead, always position the solar panels parallel to the sky, using adjustable heads or wedge-shaped bases to compensate for the incline. For slopes exceeding 15 degrees, consider terraced installation methods or specialized mounting brackets to maintain optimal solar collection.
Drainage patterns significantly affect solar path light performance. Placing lights in natural water collection areas or depressions can lead to water damage and reduced lifespan. Create small gravel beds around each light base to improve drainage and prevent water accumulation. During installation, ensure the base of each light sits slightly above ground level – about half an inch – to prevent direct contact with standing water.
Several key practices help ensure success:
• Install lights on compacted soil or gravel beds for better stability
• Use ground anchors in areas prone to frost heave
• Position solar panels away from water runoff paths
• Adjust fixture heights on slopes to maintain consistent illumination patterns
• Add extra support for lights in areas with high wind exposure
Clay-heavy soils pose particular challenges during seasonal changes. These soils expand and contract significantly, which can push lights out of position. Installing a 4-inch deep gravel foundation beneath each light helps maintain stability throughout the year. In areas with frequent freeze-thaw cycles, choosing flexible mounting systems allows the lights to move slightly without becoming permanently misaligned.
Working around landscaping features
Integrating solar path lights with existing landscaping features requires thoughtful planning and creative solutions. Mature trees and shrubs can pose challenges for light placement, as their shadows might interfere with solar charging and illumination patterns. Position lights at least 3 feet away from large plant bases to prevent root interference and minimize shadow impact. For areas with dense foliage, consider using taller light fixtures that can capture sunlight above the plant canopy.
Decorative rocks and garden borders present natural opportunities for light integration. Nestle solar fixtures between rocks to create a seamless blend of lighting and landscape elements. When working around flower beds, position lights slightly behind border plants to create depth while maintaining clear pathway illumination. Remember to account for plant growth – what works today might become obscured as vegetation fills in during the growing season.
Water features require special consideration in outdoor lighting design. Install solar path lights at least 24 inches from fountains or ponds to prevent water spray from affecting the fixtures. Use weather-resistant models specifically rated for wet conditions in these areas. Creating a harmonious balance between moving water and pathway lighting enhances the nighttime ambiance while ensuring safe passage.
Key implementation strategies include:
• Position lights to complement rather than compete with existing features
• Allow 2-3 feet clearance from spreading plants and ground cover
• Install protective barriers around lights near lawn edges to prevent damage from maintenance equipment
• Use elevated mounting options near landscape features that might obstruct ground-level lights
• Incorporate lights into existing hardscape elements like retaining walls
Mulched areas require additional attention when installing pathway lighting. Create small clearings around each light base to prevent mulch from covering solar panels or blocking light output. Use collar guards or decorative rings to maintain these clear zones while preserving the aesthetic appeal of your landscaping. Professional landscapers recommend checking fixture positions monthly during the growing season to ensure plant growth hasn’t compromised their effectiveness.
Remember to consider the visual flow of your outdoor space when positioning lights around features. Each element should work together to create a cohesive nighttime landscape that’s both beautiful and functional. Regular adjustment and maintenance of fixtures around growing plants will ensure your pathway lighting continues to perform optimally throughout the changing seasons.
Height and angle adjustments
- How high should I mount my solar path lights for the best illumination?
- The optimal height for pathway solar lights is typically 18-24 inches above ground level. This height provides adequate ground coverage while minimizing glare and ensuring the solar panels can efficiently capture daylight.
- Can I adjust the angle of my solar lights after installation?
- Most quality solar path lights feature adjustable heads that allow you to modify both the light direction and solar panel angle. For optimal charging, the solar panel should face south at approximately a 45-degree angle in most North American locations.
- My solar lights keep tilting – how can I fix this?
- Tilting issues usually stem from improper installation depth or unstable soil conditions. Install the stake at least 6-8 inches deep in compacted soil, and consider using stabilizing brackets or concrete footings in areas with loose soil.
- Should I adjust my pathway lights’ height seasonally?
- Seasonal adjustments may be necessary to maintain optimal solar charging and illumination, especially in regions with significant snow accumulation. Raise lights 2-3 inches above normal height during winter months and adjust solar panel angles to compensate for lower sun positions.
- What’s the best angle for solar lights on a sloped pathway?
- On sloped pathways, maintain the light head parallel to the ground while keeping the solar panel parallel to the sky. Use adjustable fixtures or wedge-shaped bases to achieve the correct angles, ensuring both proper illumination and efficient solar charging.
Maintenance and seasonal adjustments
Regular upkeep ensures your solar path lights perform optimally throughout the year. Clean the solar panels monthly using a soft, damp cloth to remove dust, pollen, and bird droppings that can reduce charging efficiency by up to 25%. Avoid using harsh chemicals or abrasive materials that might scratch the panels’ protective covering.
Seasonal changes require specific adjustments to maintain optimal lighting performance. During fall, clear fallen leaves from around the fixtures to prevent moisture accumulation and potential damage. Before winter sets in, consider raising lights slightly above their normal height to account for snow accumulation – experts recommend adding 2-3 inches of clearance in snowy regions.
Battery maintenance plays a crucial role in long-term performance. Most solar path lights use rechargeable batteries that typically last 1-2 years. Replace them before they completely fail to maintain consistent illumination. For optimal performance, use batteries specifically designed for outdoor solar applications, as they better withstand temperature fluctuations.
Weather conditions significantly impact charging efficiency:
• Remove snow and ice from solar panels within 24 hours
• Trim back overhanging branches that may have grown to block sunlight
• Adjust solar panel angles quarterly to match seasonal sun positions
• Check for water damage or condensation inside fixtures after heavy rains
• Tighten loose components that may have shifted due to temperature changes
Professional landscapers recommend conducting monthly inspections during peak growing seasons to ensure plants haven’t overgrown the lights. Trim any vegetation that casts shadows on the solar panels or blocks the light path. In regions with extreme temperature variations, check that expansion and contraction haven’t caused fixtures to become loose or misaligned.
Keep replacement parts on hand for quick repairs – common items include spare stakes, lens covers, and battery compartment seals. Some manufacturers offer maintenance kits specifically designed for their outdoor lighting systems. Store these supplies in a dry, accessible location for easy access when needed.